
Best level tool for picture hanging comes down to one thing: how you like to work on the wall, quick and casual, or measured and repeatable for a whole gallery.
If you have ever stepped back, thought a frame looked fine, then noticed it “tilts” the moment you sit down, you already know why this matters. A small angle error becomes obvious across a long sofa, especially under bright daylight or ceiling lights.
This guide sorts the popular options in 2026, shows what each tool is actually good at, and gives a practical workflow you can follow even if your walls, hooks, and frames are all a little inconsistent.

What “best” really means for a picture-hanging level
A level can be perfectly accurate and still feel “wrong” for picture hanging. On walls, you deal with tiny contact surfaces, soft drywall, and hardware that shifts as weight settles.
- Speed: Can you place it, read it, and move on without fuss?
- Repeatability: Can you get matching heights across multiple frames?
- Wall-friendliness: Does it avoid extra holes, tape residue, or scuffs?
- Frame compatibility: Works for thin metal frames, chunky wood, canvases, or floating shelves.
- Confidence at a distance: The end result looks level from across the room, not only close up.
One more reality check: some “crooked” frames are caused by the hanger shifting, not the level. So the best level tool for picture hanging is often the one that also helps you mark and re-check after the frame loads.
Quick comparison table: tools that work well in 2026
Here is a practical way to choose without overthinking it. These categories exist in most big-box stores and online marketplaces, even though brands vary.
| Tool type | Best for | Pros | Watch-outs |
|---|---|---|---|
| Mini bubble (torpedo) level | Single frames, quick fixes | Cheap, durable, fast | Easy to misplace, needs stable frame edge |
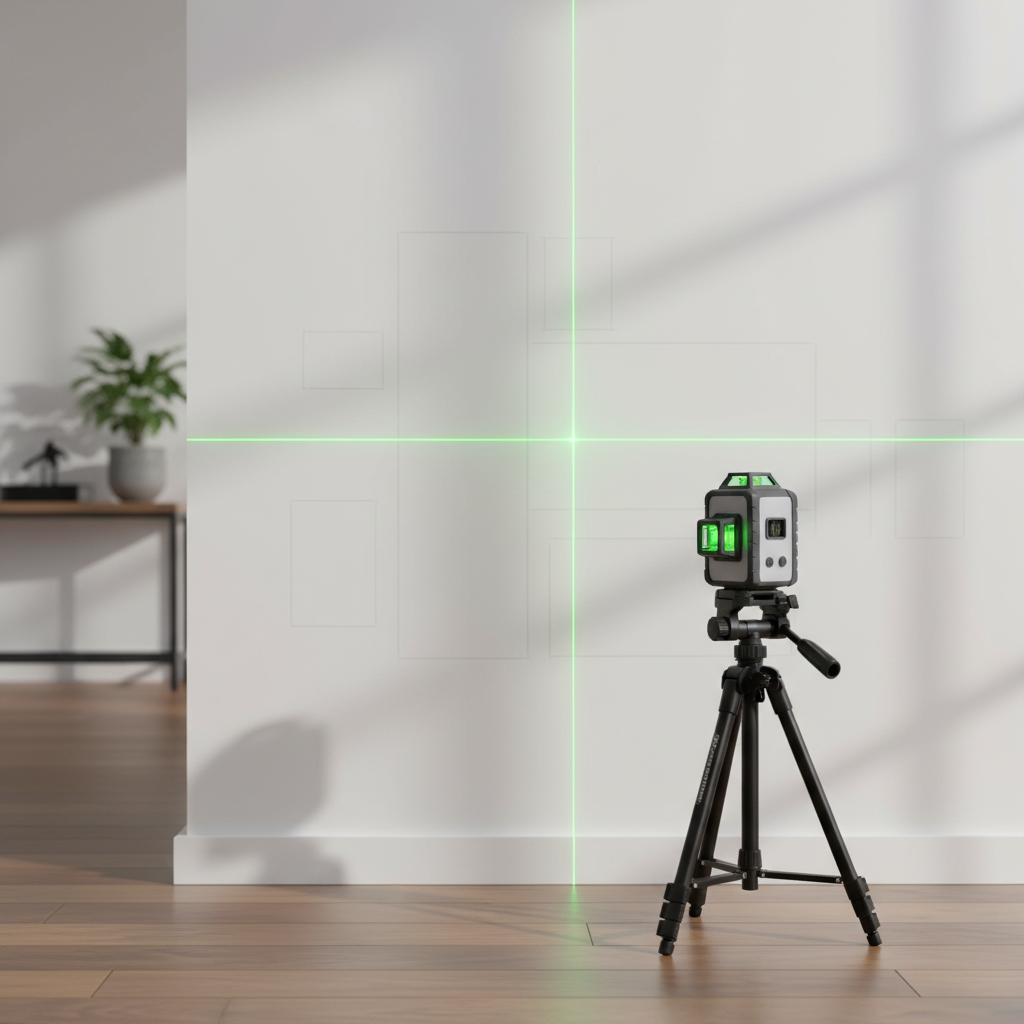
| Line laser level | Gallery walls, shelves, long rows | Clear reference line across the wall | Setup takes time, needs stable placement |
| Cross-line laser level | Centered layouts, grids | Vertical + horizontal alignment | Can be overkill for one frame |
| Smartphone level app | Occasional use, travel | Always with you | Accuracy varies, phone cases affect readings |
| Long box level (24–48 in.) | Large frames, mantels, ledges | Great for wide spans | Awkward in tight spaces, slower on small frames |
Pick the right tool based on your hanging scenario
If you only hang a couple of frames a year, a small bubble level is hard to beat. It is simple, accurate enough in most homes, and doesn’t make you set up equipment.
If you are building a gallery wall, a laser becomes the best level tool for picture hanging because it gives you a shared reference line. You stop “measuring from the floor” over and over, which is where many layouts drift.
Common “best fit” recommendations
- One medium frame over a desk: mini bubble level + tape measure.
- Three frames in a row over a sofa: line laser (or long box level if you already own one).
- Grid layout (2x2, 3x3): cross-line laser + painter’s tape for temporary borders.
- Heavy mirror or large art: long box level + stud finder, and consider a second person for safety.
According to OSHA, ladders should be used on stable surfaces and with proper positioning to reduce fall risk. If you find yourself leaning awkwardly to “just nudge it,” pause and reset the setup.
A fast self-check: what is actually making your frames look crooked?
Before you buy another tool, check which problem you have. This saves money and frustration.
- The frame is level, but it looks wrong: the ceiling line, trim, or nearby furniture may be off-level, your eye compares everything.
- It was level, then shifted: hanger wire slides, sawtooth hangers slip, or the hook rotates under load.
- Two frames look uneven: you matched “top edges” on different frame thicknesses, or the hang points differ.
- Your marks were right, holes are wrong: drill bit wandered, drywall crumbled, anchor spun.
If you keep correcting the same frame, you may not need a more expensive device, you may need better hardware or a more repeatable marking method.
Step-by-step workflow: straight results without re-doing holes
This is the process that tends to hold up across different homes and wall types, and it works whether you use a bubble level or a laser.
1) Decide what you are aligning to
- Over furniture, many people align to the furniture centerline, not the room center.
- For gallery walls, choose a single horizontal datum (for example, the visual center line) and stick to it.
2) Mark with painter’s tape, not raw pencil on paint
- Place a small strip where the top edge or center should land.
- Make your mark on the tape, you can remove it cleanly after.
3) Convert the frame to “hang points”
- D-ring + wire: measure from the top of frame down to the wire when pulled taut at the expected load point.
- Two D-rings, no wire: measure down to each ring, and measure the distance between rings.
- Sawtooth: measure from the top edge to the sawtooth slot you will use.
This is where the best level tool for picture hanging helps most: you are no longer eyeballing the final frame, you are placing hang points so the frame lands level.
4) Install hardware, then “load test” and re-check
- Hang the frame, then press gently down to seat it.
- Re-check level on the frame edge.
- If it shifts, adjust the wire position on the hook or switch to more stable hangers.
Practical tips that make any level work better
Small habits matter more than most people expect, especially when you hang multiple pieces.
- Use a consistent reference edge: top frame edge is usually more reliable than a beveled bottom.
- Measure twice on the frame, once on the wall: wall fixes are the expensive part.
- Stand back early: check from your normal viewing spot before making final holes.
- Mind the wire slack: too much slack makes micro-tilts more likely after a door slam.
- For pairs: match “center height,” not “top height,” if frames differ in size.

Common mistakes (and how to avoid them)
A lot of frustration comes from doing “one small thing” that compounds across the wall.
- Trusting the trim line: baseboards and crown molding are often not perfectly level, use your level or laser, not the room’s edges.
- Using a phone app on a curved frame: the sensor may be fine, but the contact point is not, the reading lies.
- Skipping stud/anchor decisions: heavy items need appropriate anchors; if you are unsure, ask a hardware pro or installer.
- Not accounting for hardware thickness: some hangers sit proud of the wall, changing where the frame lands.
- Over-correcting tiny tilts: walls and frames are rarely perfect, chase “looks right” after a reasonable level check.
According to CPSC, many home injuries involve falls, including from ladders, so if you are working above shoulder height, it may be worth having someone spot the ladder or using a stable platform.
Conclusion: the best choice for most homes in 2026
For most people, the best level tool for picture hanging is a mini bubble level paired with a tape measure and painter’s tape, it solves the everyday “one frame is slightly off” problem quickly. If you plan a gallery wall or you want consistent heights across a room, a line or cross-line laser becomes the smarter buy because it reduces layout drift and rework.
Key takeaways:
- If you hang occasionally, buy simple and focus on good marking habits.
- If you hang in batches, choose a laser for shared reference lines.
- If frames keep tilting, look at wire/hardware stability, not just the level.
If you are hanging something large or valuable and the wall material feels uncertain, consider getting advice from a local installer or hardware specialist, it can prevent avoidable damage.
Pick one tool, follow the workflow above, and you will spend more time enjoying the wall than nudging frames by a millimeter.