
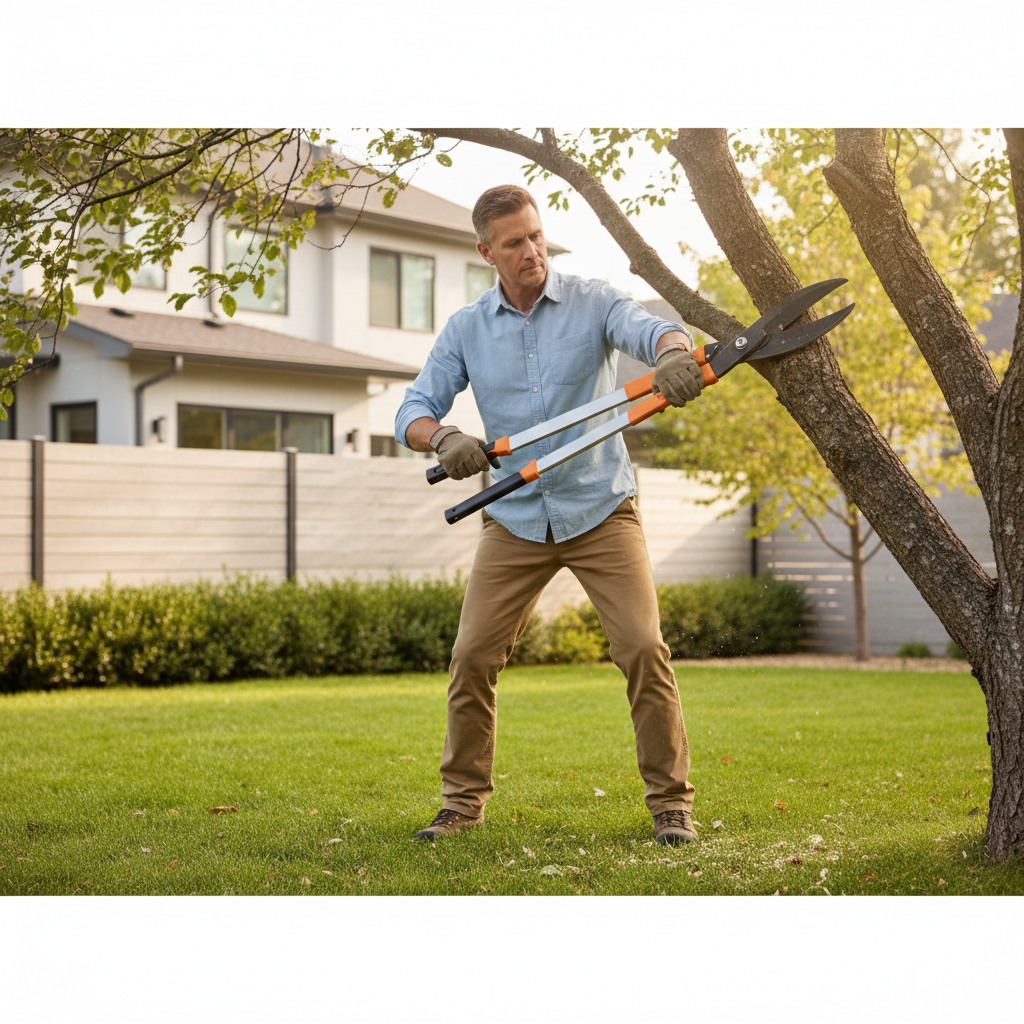
How to cut thick branches with a lopper comes down to three things: choosing the right tool, making a clean cut in the right spot, and using body position and leverage so you don’t fight the branch the whole time.
If you’ve ever watched a lopper stall halfway through a limb, or you ended up tearing bark instead of slicing wood, you already know why this matters, a bad cut can stress the tree and make your work feel twice as hard.
This guide stays practical, what “thick” really means for different loppers, how to set up the cut, how to avoid pinching and bending blades, and when it’s smarter to switch tools instead of forcing it.
What “thick” means for a lopper (and why ratings are not the whole story)
Most people define “thick” as anything their hand pruners can’t handle, but for a lopper it’s more specific: you’re usually in the 1 to 2.5 inch range, depending on lopper design and the wood species.
Manufacturers often publish a maximum cut diameter, but real-world capacity shifts with branch hardness, moisture, blade sharpness, and whether the branch can flex. A fresh green maple limb behaves very differently than seasoned oak.
Quick capacity guide (realistic, not optimistic)
| Tool type | Comfort zone | “Maybe” zone | Better alternative |
|---|---|---|---|
| Bypass lopper (standard) | Up to ~1.5 in | 1.5–2 in (soft wood) | Pruning saw |
| Ratchet lopper | Up to ~2 in | 2–2.5 in (soft/medium) | Pruning saw, pole saw |
| Anvil lopper | Up to ~1.75 in (dead wood) | 1.75–2 in | Pruning saw |
| Power lopper / battery pruner | Varies by model | Varies by model | Chainsaw (trained use) |
If you’re repeatedly forcing a cut in the “maybe” zone, you’ll feel it in your hands and you’ll see it in the branch, crushing, tearing, or a ragged finish. That’s your cue to change approach.
Pick the right lopper style for the branch you’re cutting
The fastest way to get clean cuts on thicker limbs is matching the lopper to the wood condition. Trying to make a bypass lopper behave like a saw is where frustration starts.
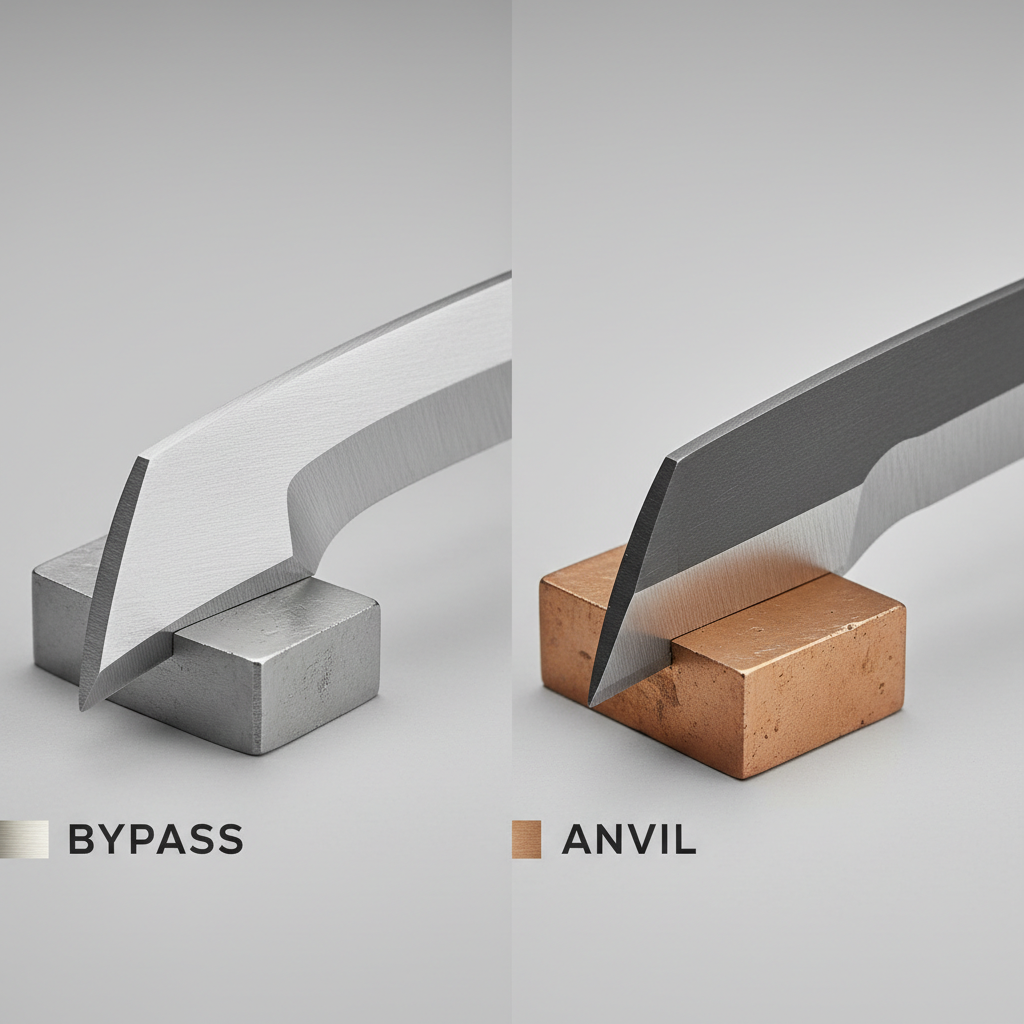
- Bypass lopper: Best for live branches because it slices like scissors, usually the cleanest finish for plant health.
- Anvil lopper: Better for dead, dry wood because it crushes against a flat anvil, it can bruise live tissue.
- Ratchet lopper: Great when leverage is the problem, it cuts in stages, slower but often easier on your body.
According to the USDA Forest Service, correct pruning cuts help trees resist decay and close wounds more effectively, which is one reason clean slicing matters more than people think.
Before you cut: a 60-second checklist that prevents jams and bark tears
How to cut thick branches with a lopper gets easier when you treat setup as part of the cut. A few quick checks save you from stuck blades and torn bark.
- Confirm the diameter: If it’s clearly beyond your lopper’s comfort zone, grab a pruning saw now.
- Check branch condition: Dead wood snaps and pinches differently than green wood, plan for less flex control.
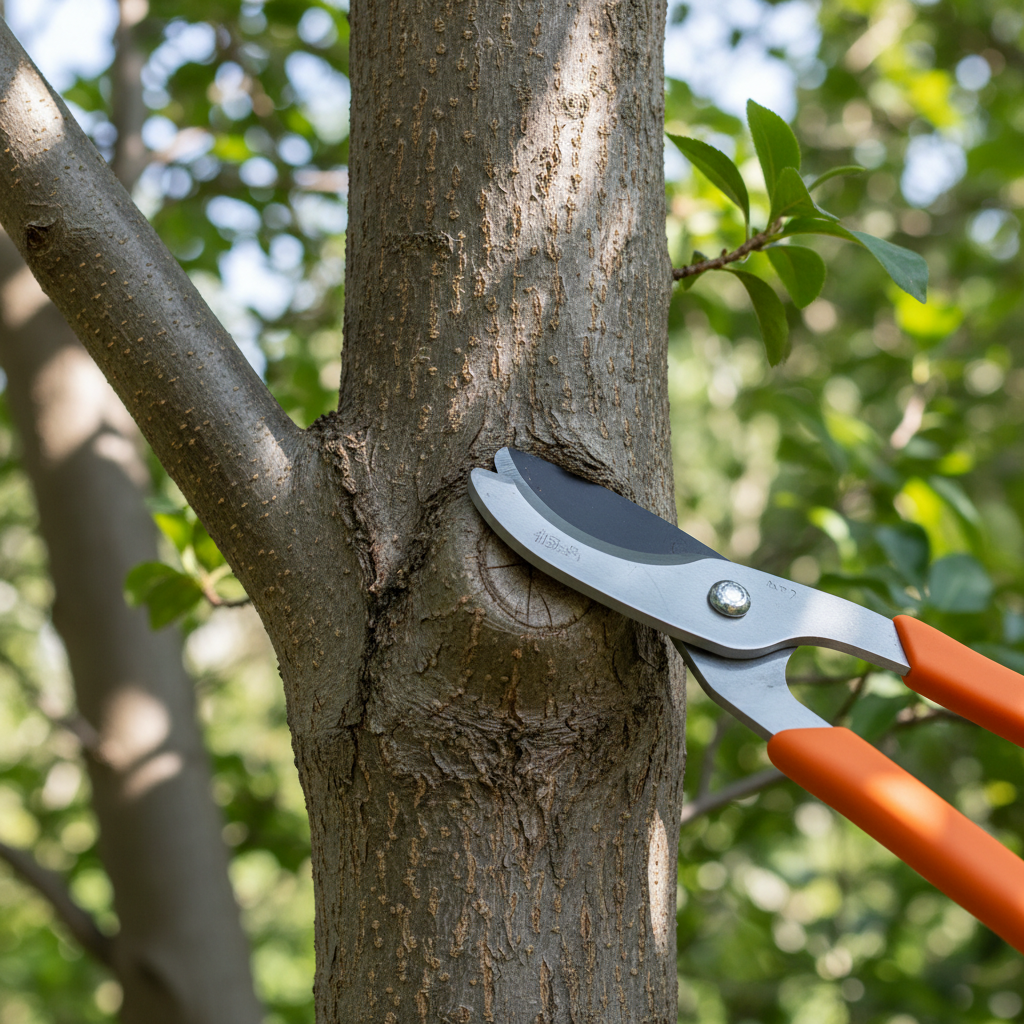
- Look for the branch collar: That slight swelling where the branch meets the trunk or larger limb, you want to cut just outside it, not flush.
- Clear your swing and stance: Make sure you won’t overbalance when the branch drops.
- Inspect blades: Sap buildup and dull edges make thick cuts feel impossible, a quick wipe often helps.
If you’re working overhead, near power lines, or on a ladder, that’s where “simple pruning” can turn risky, many homeowners choose to call an arborist for those situations.
Step-by-step: the clean-cut method for thick branches
This is the method that tends to work across most yards and most loppers, especially with bypass or ratchet models. The goal is a clean finish without blade pinch.
1) Position the blades where they can actually bite
Open the lopper fully and place the branch as deep into the jaws as the tool allows, close to the pivot point, not out at the tips. The pivot area delivers the most force, tip cuts waste leverage and twist the blades.
2) Angle for a clean finish
A slight angle can help, but don’t chase perfect geometry. What matters is keeping the blades square to the wood so they don’t slide and shave.
3) Pre-load the cut, then commit
Squeeze until the blades bite, pause for a half-second to confirm the branch isn’t rolling, then finish with a steady squeeze. Jerky force often pinches the cut and stalls the blades.
4) Use your body, not just your hands
Keep elbows closer to your sides, set your feet, and bring handles together using your shoulders and core. Thick cuts punish wrists and forearms when you “white-knuckle” the handles.
5) If it stalls, stop and reset
When you feel a stall, avoid twisting the handles to “pop” the branch through, that’s how blades bend. Back off, reposition deeper in the jaws, or switch tools.
When the branch is heavy: avoid tearing with a simple weight-control approach
Even if the lopper can cut the wood, the branch weight can rip bark as it falls. That damage usually happens in the last second, right when you think you’re done.
- Support the branch: If you can, hold it with your free hand or rest it on another limb so it can’t peel downward.
- Reduce leverage: For long limbs, remove smaller side branches first so the main cut carries less weight.
- Use a two-cut strategy: Make a small “relief” cut a few inches out, then make your final cut near the collar. This lowers the chance of a bark tear.
For very heavy limbs, a pruning saw with an undercut-first sequence is often safer for the tree and easier for you than forcing a thick lopper cut.
Common mistakes that make thick branches harder than they should be
A lot of frustration comes from a handful of repeatable errors. Fix these and your current lopper may feel like a better tool.
- Cutting with the tip of the blades: You lose mechanical advantage and increase blade twist.
- Cutting too close to the trunk: Flush cuts can slow closure and raise decay risk, leave the branch collar intact.
- Using an anvil lopper on live wood: It can crush the cambium and leave a rough wound.
- Letting blades get gummy: Sap and grime increase friction, thicker cuts start to bind.
- Trying to “muscle through” stalls: That often damages the tool and still leaves a ragged cut.
According to ANSI A300 (tree care performance standards), proper cut placement and avoiding unnecessary wounding are central to good pruning practice, which aligns with the collar-aware approach above.
Safety and tool-care basics (the stuff people skip, then regret)
Cutting thicker limbs increases stored tension and the chance a branch swings or drops unpredictably. If you feel unsure, it’s reasonable to ask a certified arborist for guidance, especially for overhead cuts.
- Eye protection: Chips and springy twigs can travel fast, especially in dry wood.
- Gloves with grip: Helps prevent handle slip when you’re squeezing hard.
- Mind the pinch zone: Don’t put fingers near the jaws when repositioning.
- Clean and lightly oil: Wipe sap, then add a light oil to pivot and blades to keep thick cuts smoother.
- Sharpen when cuts get crushed: A sharp bypass blade should leave a crisp surface, not a mashed edge.
If you’re pruning diseased branches, many gardeners disinfect blades between cuts to reduce spread, practices vary by plant and pathogen, so checking local extension guidance can help.
Key takeaways and a quick “do this next” plan
Key points: Use the right lopper type, cut deep in the jaws near the pivot, aim just outside the branch collar, and control branch weight so the last moment doesn’t tear bark.
For your next session, pick one tree or shrub, identify which cuts fall inside your lopper’s comfort range, then handle the heavier limbs with a pruning saw instead of turning every cut into a wrestling match. If you keep hitting stalls even on reasonable sizes, cleaning and sharpening often fixes more than people expect.
FAQ
- What is the maximum branch size I can cut with a lopper?
It depends on the lopper type and the wood. Many standard bypass loppers feel comfortable around 1 to 1.5 inches, ratcheting models can sometimes handle more, but if you’re forcing it, a pruning saw is usually the better move. - How do I cut thick branches with a lopper without damaging the tree?
Make the final cut just outside the branch collar and avoid flush cuts. If the limb is heavy, reduce weight first or use a relief cut so the bark doesn’t peel as it drops. - Why does my lopper get stuck halfway through the cut?
Common causes include cutting too far out on the blade tips, dull or sticky blades, or the branch closing and pinching the cut. Reset deeper near the pivot, and consider a ratchet lopper or saw for tighter grain wood. - Is a bypass or anvil lopper better for thick branches?
For live branches, bypass usually gives a cleaner cut. For dead wood, anvil can be efficient, but it may crush living tissue, so it’s not always a good fit for green growth. - Should I use a lopper or a pruning saw for a 2-inch branch?
Sometimes a strong ratchet lopper can do it, especially on softer species, but a pruning saw often finishes faster with less strain and less risk of bending the lopper. - Do I need to seal or paint the cut after lopping?
Many modern tree-care recommendations discourage routine wound dressings because they can trap moisture, but situations vary by species and local conditions. If you’re unsure, a local extension office or arborist can advise for your area.
If you’re dealing with a lot of thicker limbs each season, or you want cleaner results with less hand strain, it may be worth choosing a ratcheting lopper, a sharper bypass model, or pairing your lopper with a quality pruning saw so you’re not asking one tool to do everything.