
How to cut wood straight with a hand saw comes down to two things most people skip, a clear layout line and a saw that starts true before you ever “go fast.” If your cut keeps wandering, it’s usually not your hands, it’s your setup, your stance, or the way you start the kerf.
This matters because a hand-saw cut often becomes the reference for everything after, joints, trim fit, shelf level, even whether a project looks homemade in a bad way. A small angle error at the start turns into a big gap by the end of the board.
Good news, you don’t need a table saw to get straight results. With the right marking method, a few strokes of disciplined technique, and one or two “cheats” like a guide block, you can get clean, repeatable cuts that look intentional.
What “straight” really means for a hand-saw cut
When people say “straight,” they usually mean three different things, and mixing them up causes frustration.
- Straight on the face: the cut follows your pencil line when viewed from above.
- Square through the thickness: the cut is 90° from face to edge, not leaning.
- Clean enough for the next step: maybe it’s not perfect, but it planes/sands to final fast.
If you need glue-ready joinery, you’ll care a lot about square through the thickness. If you’re rough-cutting to length, following the line on the face might be enough, then you refine.
Common reasons your hand-saw cut wanders
Most crooked cuts come from a predictable list, and it’s rarely “I’m just bad at this.”
- A vague line: thick pencil marks and no knife line invite drift.
- Bad start: the first 10–15 strokes set the track, if they’re angled, the whole cut follows.
- Board movement: a vibrating workpiece makes you chase the line.
- Wrong saw for the job: coarse teeth tear and grab in thin stock, fine teeth feel slow in thick lumber.
- Grip and stance: your arm swings in an arc, if your body fights that arc, the saw steers off-line.
- Dull or set issues: a dull saw forces you to push, a saw with uneven “set” can pull to one side.
According to OSHA, hand tool injuries often tie back to poor condition tools and unstable workpieces, so treating “setup” as a safety step is not overkill.
Quick self-check: what kind of “crooked” are you getting?
Before you change everything, diagnose the pattern. The fix is different if you’re off-line versus out-of-square.
| What you see | Likely cause | Fastest fix |
|---|---|---|
| Cut veers left/right on the face | Weak layout line, rushing the start, twisting wrist | Knife line + slower start strokes, watch the far corner |
| Cut follows line, but edge is angled | Saw not held plumb, stance too close, chasing only one side | Check plumb every few strokes, watch both top corners |
| Saw binds halfway through | Kerf closing, board pinched, dull teeth | Add support, use a wedge, reduce downward pressure |
| Saw always pulls the same direction | Uneven tooth set or damage | Try a different saw, consider sharpening/service |

Setup that makes straight cuts easier (marking and support)
If you want to know how to cut wood straight with a hand saw without “white-knuckling” the whole cut, spend your patience here. The saw will behave better because you give it a path.
1) Mark a line you can actually follow
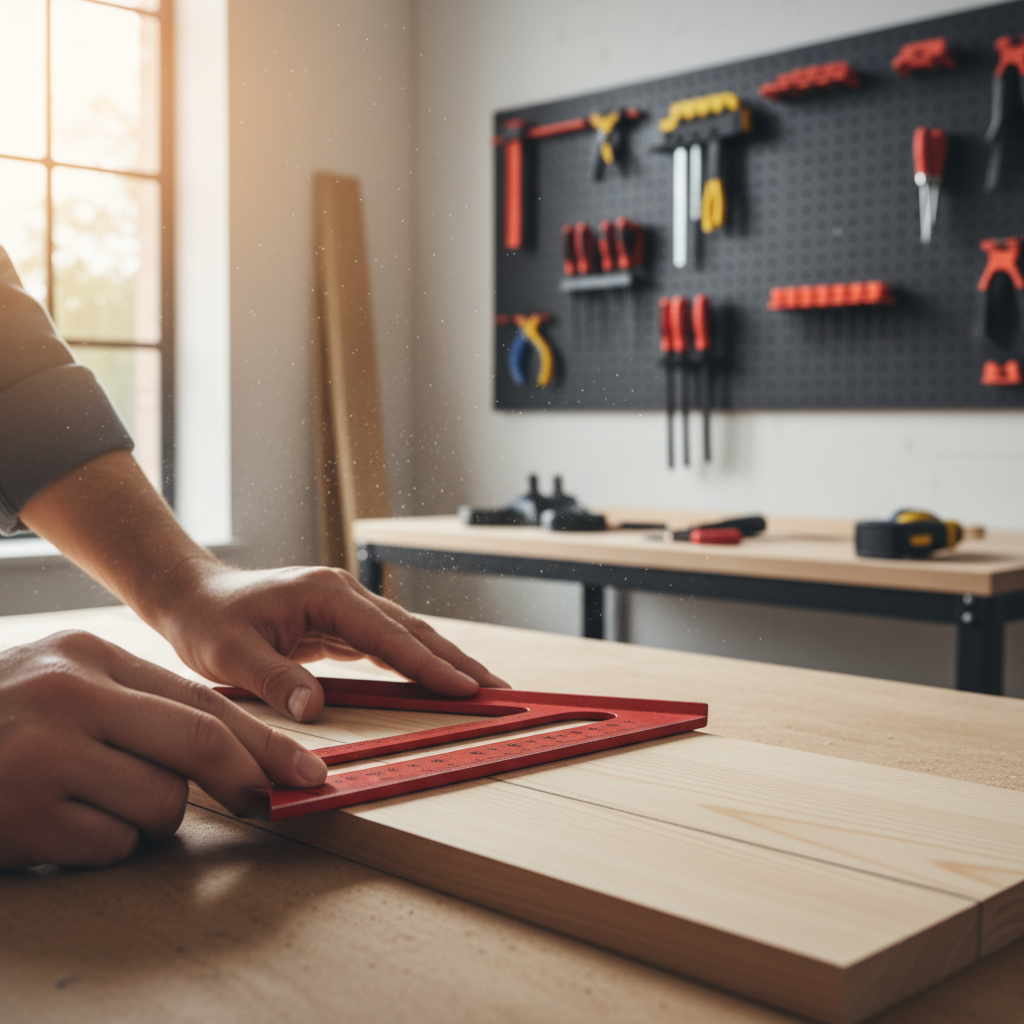
- Use a square (speed square or combination square) to draw the cut line on the face.
- Carry the line down the edge so you have a second reference while cutting.
- Upgrade to a knife line for clean work: score the line lightly with a utility knife. It creates a tiny groove that helps the saw start true and reduces splintering.
For splinter-prone boards, light scoring plus painter’s tape on the waste side can help, though tape is not magic if the saw is dull.
2) Clamp like you mean it
- Clamp the board to a bench, sawhorses, or a stable table, avoid cutting on your knee or against a wobbly surface.
- Support the offcut so it doesn’t snap fibers at the end of the cut.
- If the kerf starts closing, insert a small wedge behind the saw, even a thin shim works.
3) Pick a saw that fits the cut
- Crosscut saw for cutting boards to length across the grain.
- Rip saw for cutting along the grain, it typically tracks better for rips.
- Backsaw (like a carcass or tenon saw) for the straightest, most controlled short cuts, the stiff spine resists bending.
If your only saw is a general hardware-store handsaw, you can still get straight results, just slow down the start and lean on layout lines.
Technique: starting the kerf and keeping it on track
This is the part people try to “muscle through.” Don’t. A straight cut is more like guiding than forcing.
Start clean
- Place your thumb beside the line as a fence, lightly guiding the blade for the first strokes.
- Angle the saw shallow to begin, then raise it once a groove forms.
- Use short strokes until the teeth sit in the kerf, then lengthen the stroke.
Watch two points, not one
- On the face, watch the line where the teeth meet the wood.
- On the near edge, glance at the carried line to keep the cut square through thickness.
A small trick that helps, aim to split the line and leave the pencil mark on the “keeper” side, you can always plane/sand down to perfect.
Let the saw do the work
- Use light forward pressure, especially with fine-tooth saws.
- Keep the wrist neutral, steering usually happens when the wrist twists to “correct” mid-stroke.
- Keep your elbow moving in a straight-ish path, your body position should support that.
Practical methods that almost guarantee a straighter cut
If you only need a few accurate cuts and you’re not trying to win a hand-tool purity contest, guides are your friend.
Method A: Clamp a guide block
- Clamp a straight scrap block just to the waste side of your line.
- Run the saw plate gently against the block for the first inch or two.
- Once the kerf is established, you can keep using the block or remove it.
This works especially well for beginners because it prevents the early drift that ruins the rest of the cut.
Method B: Use a miter box for short crosscuts
- A basic plastic miter box can keep 90° and 45° cuts consistent.
- For better accuracy, a heavier-duty miter box or a backsaw combo tends to flex less.
Method C: Score-and-saw for clean edges
- Deepen the knife line with a couple passes.
- Start the saw in that groove with short strokes.
- Stay just on the waste side, then refine.
Fixing a cut that’s going off-line (without starting over)
Even when you know how to cut wood straight with a hand saw, you’ll still have moments where the blade “votes” for a different route. The goal is to correct early and gently.
- If you’re drifting off the face line, stop, back up a few strokes, then re-enter the kerf with the blade angled slightly toward the waste to nudge the track back.
- If you’re out of square, bias pressure toward the high side, then take a few strokes that remove material where it’s proud, check again.
- If the saw binds, reduce downward force, support the offcut, and add a wedge behind the blade.
If you’re already past the point of “saveable,” don’t fight it for ten more minutes, finish the cut safely, then true the edge with a hand plane, a sanding block on a flat reference, or a jointer if you have access.
Safety notes and common mistakes to avoid
Hand sawing is simple, but it’s not carefree. Small lapses tend to cause the annoying injuries.
- Clamp the work, holding stock by hand often causes slips, especially near the end of a cut.
- Keep your off hand out of the line of travel, if the saw jumps, it goes forward.
- Don’t rush the last inch, that’s where tear-out and sudden breaks happen.
- Avoid “death grip” sawing, tight grip adds shake, shake creates a wavy kerf.
- Respect tool condition, a damaged or very dull saw can behave unpredictably; if you’re unsure, a local hardware store or sharpening service can advise.
According to the U.S. Consumer Product Safety Commission (CPSC), many home workshop injuries involve lacerations from hand tools, so if you have any medical concerns or reduced hand strength, it may be smart to consult a professional or use a guided cutting method.
Key takeaways and a simple practice plan
Key takeaways: a crisp line, stable support, a clean start, and periodic square checks beat “more effort” every time. If you only change one habit, slow down the first inch of the cut.
Practice plan that works in the real world, grab a scrap 1x4 and do five cuts, each time mark a line, carry it down the edge, start with short strokes, then check for square with a combination square. You’ll feel the improvement quickly because your corrections happen earlier.
If you want a next step, try the guide-block method on two cuts and compare, it teaches your hands what “straight” feels like without guessing.
FAQ
- How do I keep a hand saw from drifting off the line?
Make a clearer layout line, start with short strokes, and watch both the face line and the edge line. Drift usually begins in the first few strokes. - Is a knife line really better than a pencil line?
Often, yes for accuracy and cleaner edges, especially on finish cuts. Pencil is fine for rough work, but a knife line gives the teeth a groove to register in. - What’s the easiest saw for straight cuts as a beginner?
A backsaw is commonly easier because the spine stiffens the blade. For longer cuts, a decent crosscut handsaw works, but setup matters more. - Why does my saw bind halfway through the cut?
The kerf may be closing from board movement or internal stress in the wood. Support both sides, clamp better, and add a small wedge behind the blade. - How can I tell if my saw is dull or has uneven set?
If you need lots of force, it chatters, burns, or always pulls one direction across different boards, the teeth may need attention. A sharpening service can confirm quickly. - Can I fix a cut that’s not square?
Usually, yes. If the edge is slightly out, plane or sand to square, or correct mid-cut by biasing pressure where it’s high and checking often. - Do I need a miter box to cut straight?
No, but it helps a lot for short, repeatable crosscuts. If you’re doing trim or small parts, it’s a practical shortcut.
If you’re cutting a lot of pieces and consistency matters more than “doing it freehand,” consider setting up a simple sawing station with a clamp-on guide and a reliable square, it’s a small upgrade that often saves the most time and frustration.